
Spring Boot3とテンプレートエンジンThymeleafを使って、様々なフォーム要素を持った画面を作成します。
目次
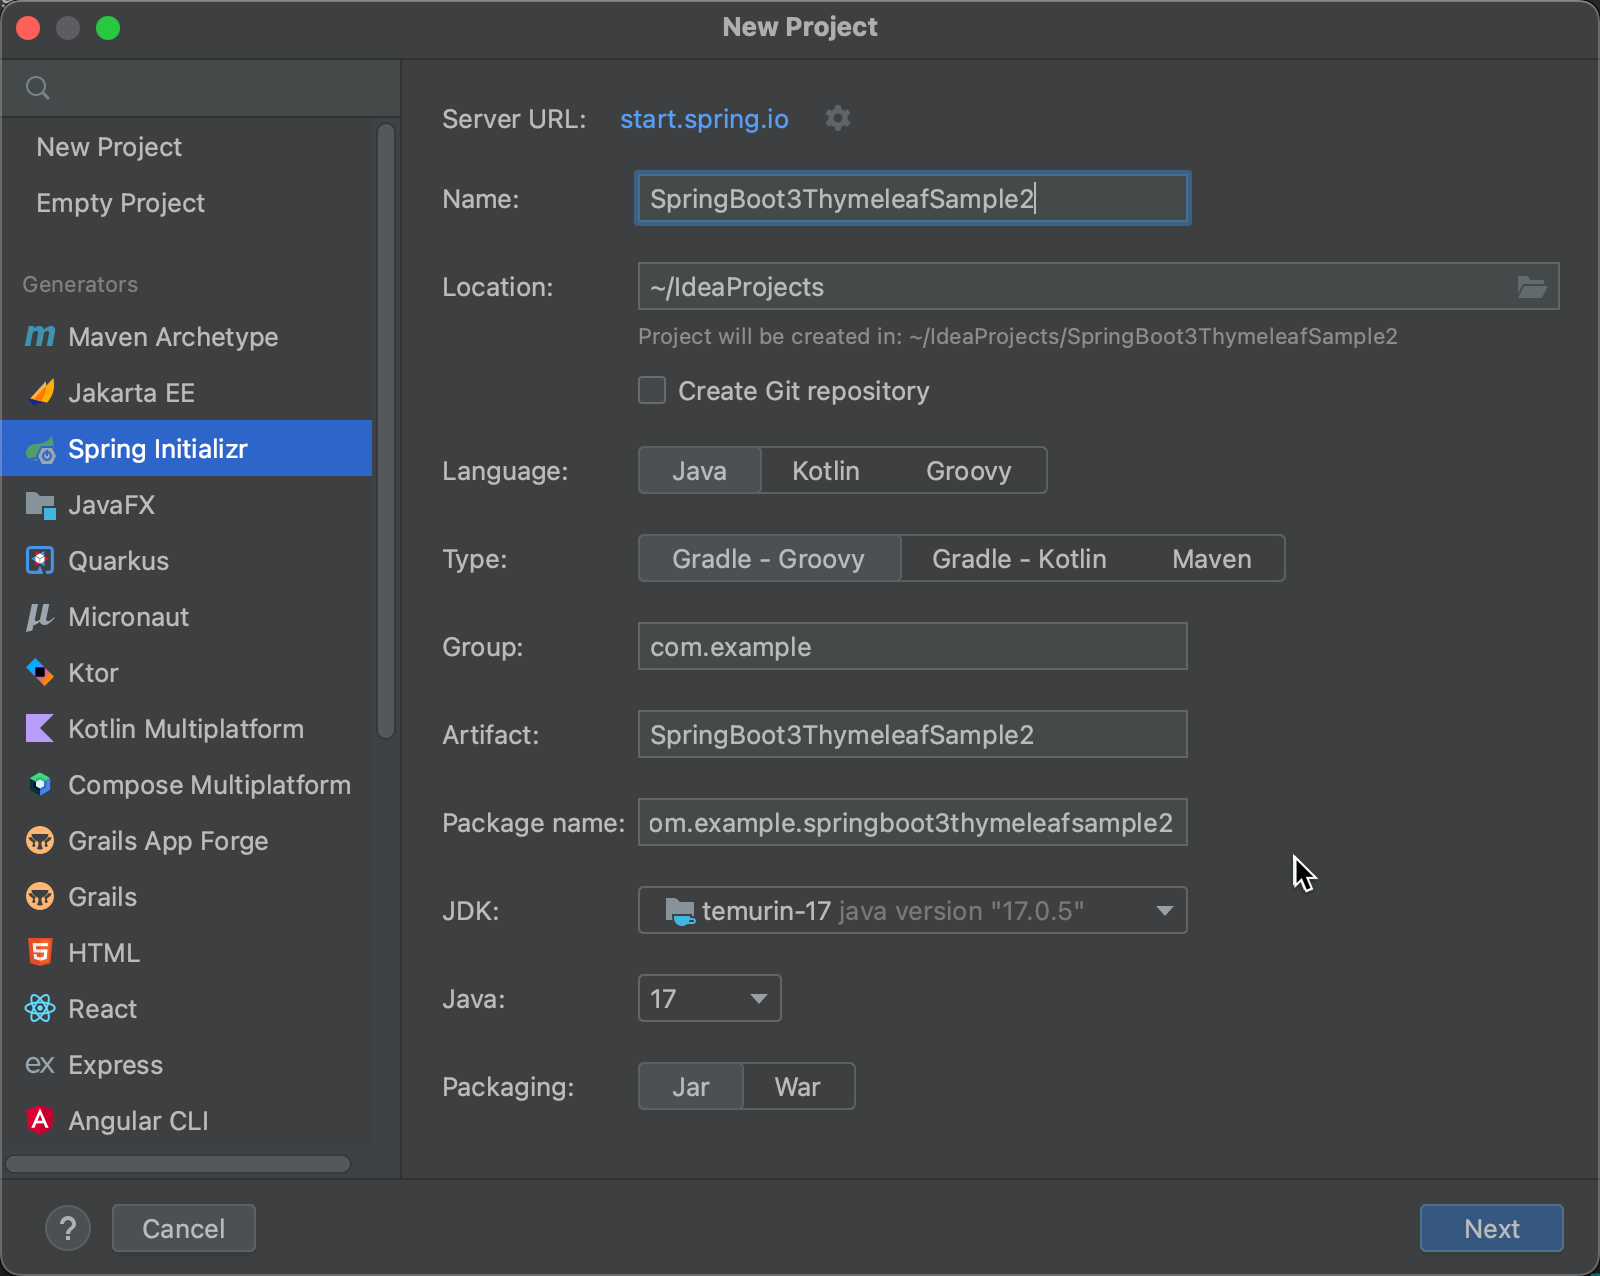
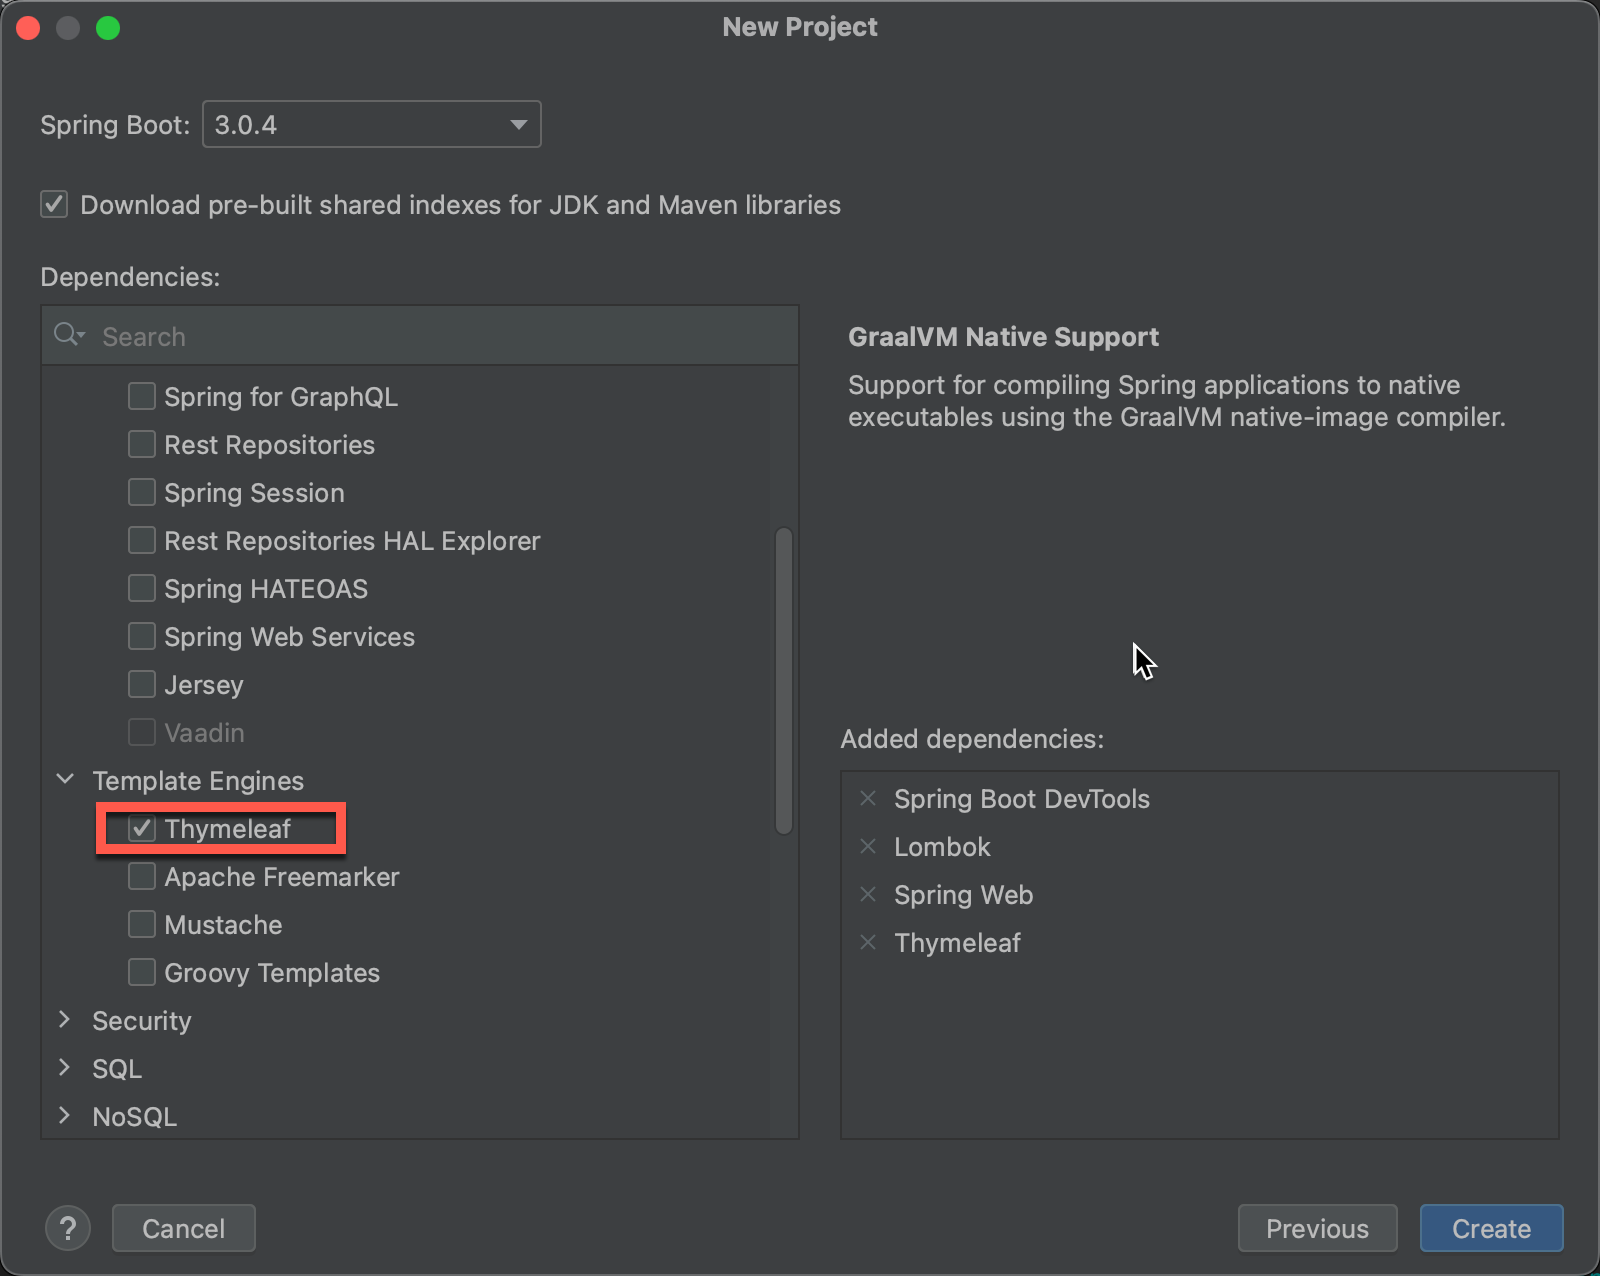
新規プロジェクト作成
Intellij IDEAでSpring Initializrからプロジェクトを作成します。

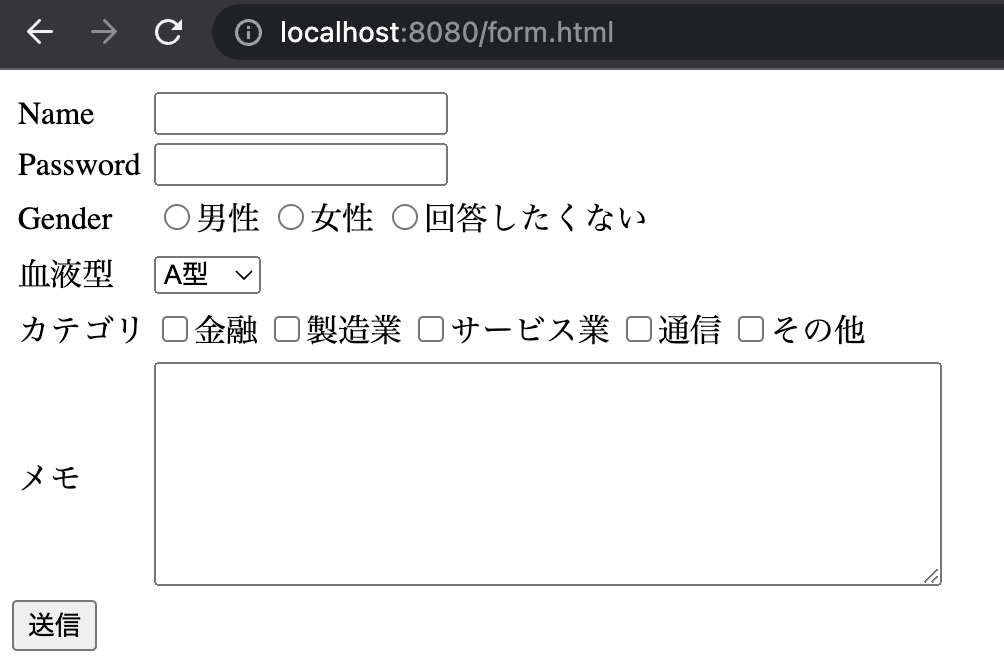
入力フォームの作成
静的HTMLで以下のファイルを作成します。
このファイルはThymeleafテンプレートではなく、静的HTMLですので、保存先は以下になります。
src/main/resources/static/form.html
<!DOCTYPE html>
<html lang="en">
<head>
    <meta charset="UTF-8">
    <title>入力フォーム</title>
</head>
<body>
<form action="register" method="post">
    <table>
        <tr>
            <td>Name</td>
            <td>
                <input type="text" name="name">
            </td>
        </tr>
        <tr>
            <td>Password</td>
            <td>
                <input type="password" name="password">
            </td>
        </tr>
        <tr>
            <td>Gender</td>
            <td>
                <input type="radio" name="gender" value="1">男性
                <input type="radio" name="gender" value="2">女性
                <input type="radio" name="gender" value="0">回答したくない
            </td>
        </tr>
        <tr>
            <td>血液型</td>
            <td>
                <select name="blood">
                    <option value="1">A型</option>
                    <option value="2">B型</option>
                    <option value="3">AB型</option>
                    <option value="4">O型</option>
                </select>
            </td>
        </tr>
        <tr>
            <td>カテゴリ</td>
            <td>
                <input type="checkbox" name="category" value="1">金融
                <input type="checkbox" name="category" value="2">製造業
                <input type="checkbox" name="category" value="3">サービス業
                <input type="checkbox" name="category" value="4">通信
                <input type="checkbox" name="category" value="g">その他
            </td>
        </tr>
        <tr>
            <td>メモ</td>
            <td>
                <textarea name="note" rows="4" cols="90"></textarea>
            </td>
        </tr>
    </table>
    <input type="submit" value="送信">
</form>
</body>
</html>
Controllerの作成
mainのエントリーポイントと@SpringBootApplicationのアノテーションがあるSpringApplicationのJavaファイルと同じ階層にControllerのJavaファイルを作成します。
@Controller
public class HelloController {
    @PostMapping("/register")
    public ModelAndView register(
            @RequestParam("name") String name,
            @RequestParam("password") String password,
            @RequestParam("gender") int gender,
            @RequestParam("blood") int blood,
            @RequestParam("category") int[] categories,
            @RequestParam("note") String note,
            ModelAndView mv
    ) {
        StringBuilder sb = new StringBuilder();
        sb.append("Name: " + name);
        sb.append("Password: " + password);
        sb.append("Gender: " + gender);
        sb.append("Blood: " + blood);
        sb.append("Category: " + Arrays.toString(categories));
        sb.append("Note: " + note.replaceAll("\n",""));

        mv.setViewName("result");
        mv.addObject("userData", sb.toString());
        return mv;
    }
}
入力結果を表示するThyemeleafテンプレートの作成
以下にThyemeleafテンプレートファイルを作成します。
src/main/resources/templates/result.html
<!DOCTYPE html>
<html xmlns:th="http://www.thymeleaf.org">

<head>
    <meta charset="UTF-8">
    <title>Result</title>
</head>
<body>
<span th:text="${userData}"></span>
</body>
</html>
実行
アプリケーションを起動してform.htmlにアクセスします。
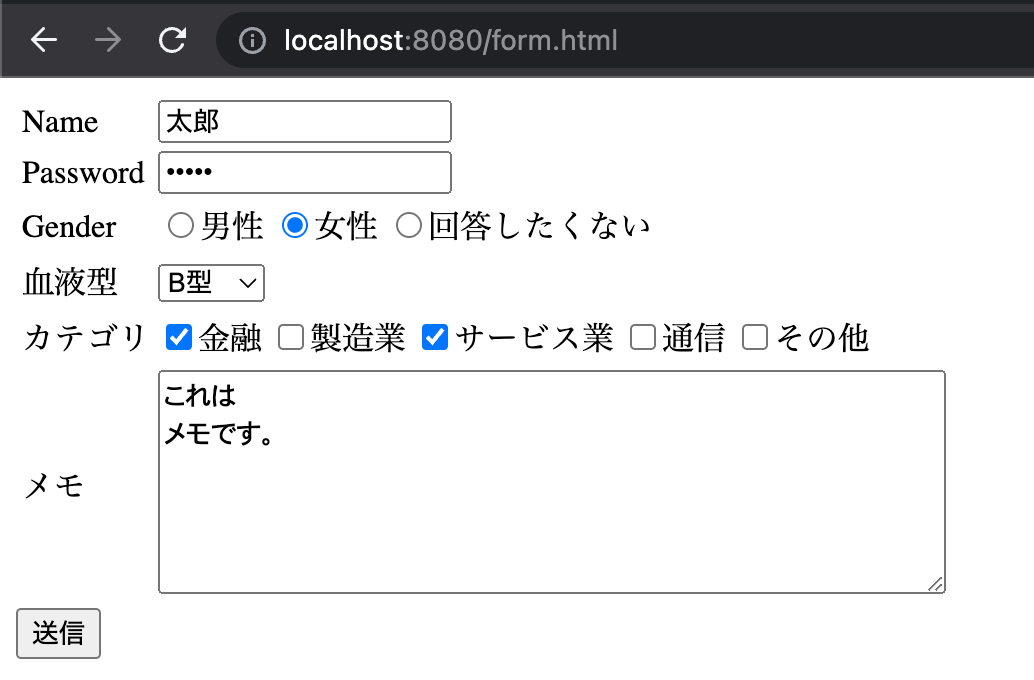
フォームに適当に入力して送信ボタンをクリックします。
Controllerで処理した内容が、Thymeleafテンプレートに表示されました。
