
Gradleを使って簡単なコンソールアプリケーションを作成するチュートリアルです。既にGradleがインストール済の前提です。
Intellij IDEAで新規プロジェクトを作成する
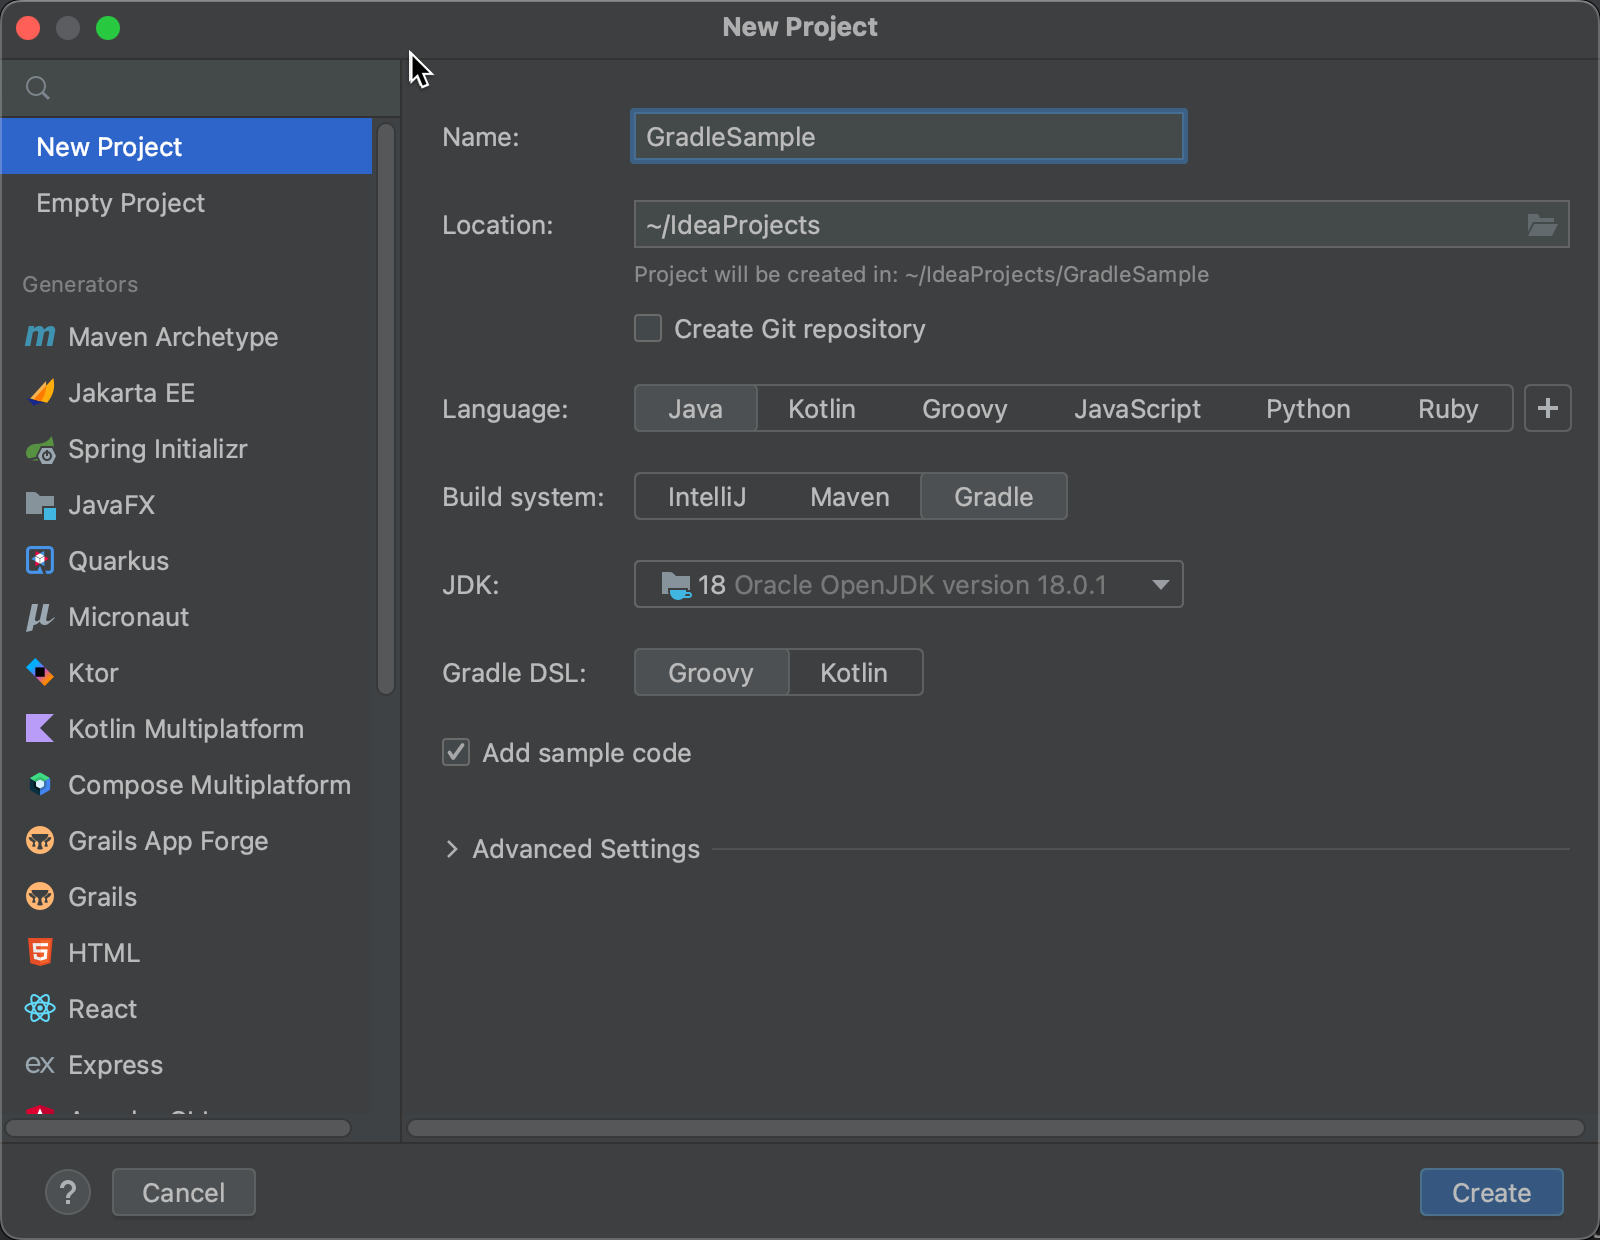
作成された build.gradleを確認します。
plugins {
    id 'java'
}

group 'org.example'
version '1.0-SNAPSHOT'

repositories {
    mavenCentral()
}

dependencies {
    testImplementation 'org.junit.jupiter:junit-jupiter-api:5.8.1'
    testRuntimeOnly 'org.junit.jupiter:junit-jupiter-engine:5.8.1'
}

test {
    useJUnitPlatform()
}
作成されたMain.javaを確認します。
package org.example;

public class Main {
    public static void main(String[] args) {
        System.out.println("Hello world!");
    }
}
プロジェクトを実行する
方法1 コンテクストメニューから実行する
エントリーポイントのある実行したいソースファイルMain.javaを開いて右クリックし、コンテクストメニューから Run 'Main.main()'をクリックします。

11:38:44: Executing ':Main.main()'...

> Task :compileJava
> Task :processResources NO-SOURCE
> Task :classes

> Task :Main.main()
Hello world!

Deprecated Gradle features were used in this build, making it incompatible with Gradle 8.0.

You can use '--warning-mode all' to show the individual deprecation warnings and determine if they come from your own scripts or plugins.

See https://docs.gradle.org/7.5.1/userguide/command_line_interface.html#sec:command_line_warnings

BUILD SUCCESSFUL in 346ms
2 actionable tasks: 2 executed
11:38:45: Execution finished ':Main.main()'.
方法2 Gradle Toolウィンドウから実行する
build.gradleに以下を追記します。
plugins {
    id 'java'
    id 'application' //この行を追記する
}

//以下を追記する
application {
    mainClassName = 'org.example.Main'
}
これでjarファイルにエントリーポイントがあるクラスを指定することになります。
build.gradleファイルのエディタ上に表示されている以下のアイコンをクリックしてbuild.gradleを再読込します。

Intellij IDEAの右側に表示されている一覧からGradle Toolウィンドウを開きます。
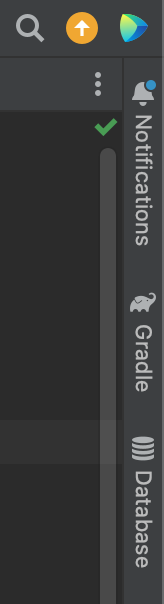
他のToolウィンドウが既にたくさん表示されている場合は一覧上に表示されていない場合があります。その場合はView > Tool Windows > Gradleで再表示させることが可能です。
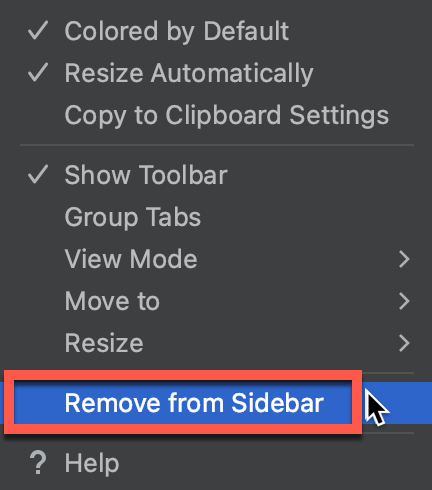
Gardle Toolウィンドウは頻繁に利用するので、常にサイドバー上に表示されているのが望ましいでしょう。
不要なToolウィンドウを開き、Options(ギアマーク) > Remove from Sidebarの順にクリックすることで、Gradle Tool Windowの表示スペースを確保することが可能です。
Gradle ToolウィンドウからTasks > application > runを選択し、ダブルクリックで実行します。

先程と同じように、Runウィンドウに実行結果が表示されます。
12:04:46: Executing 'run'...

> Task :compileJava
> Task :processResources NO-SOURCE
> Task :classes

> Task :run
Hello world!

Deprecated Gradle features were used in this build, making it incompatible with Gradle 8.0.

You can use '--warning-mode all' to show the individual deprecation warnings and determine if they come from your own scripts or plugins.

See https://docs.gradle.org/7.5.1/userguide/command_line_interface.html#sec:command_line_warnings

BUILD SUCCESSFUL in 453ms
2 actionable tasks: 2 executed
12:04:46: Execution finished 'run'.runは実行前にコンパイルをしてくれます。
方法3 Run Configurationから実行する
build.gradleに以下が追加されている前提です。
plugins {
    id 'java'
    id 'application' //この行を追記する
}

//以下を追記する
application {
    mainClassName = 'org.example.Main'
}
Edit Configurationsをクリックします。
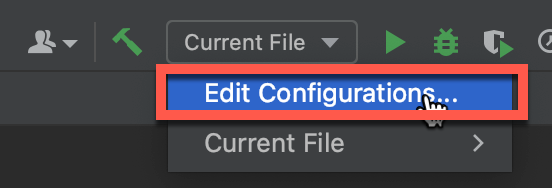
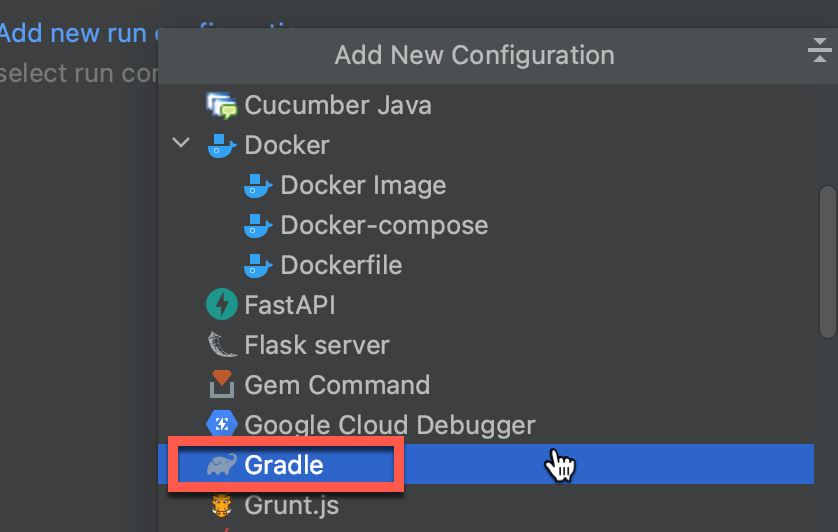
Add new run configuration...をクリックします。一覧からGradleを選択します。
Runテキストボックスでrunを選択します。
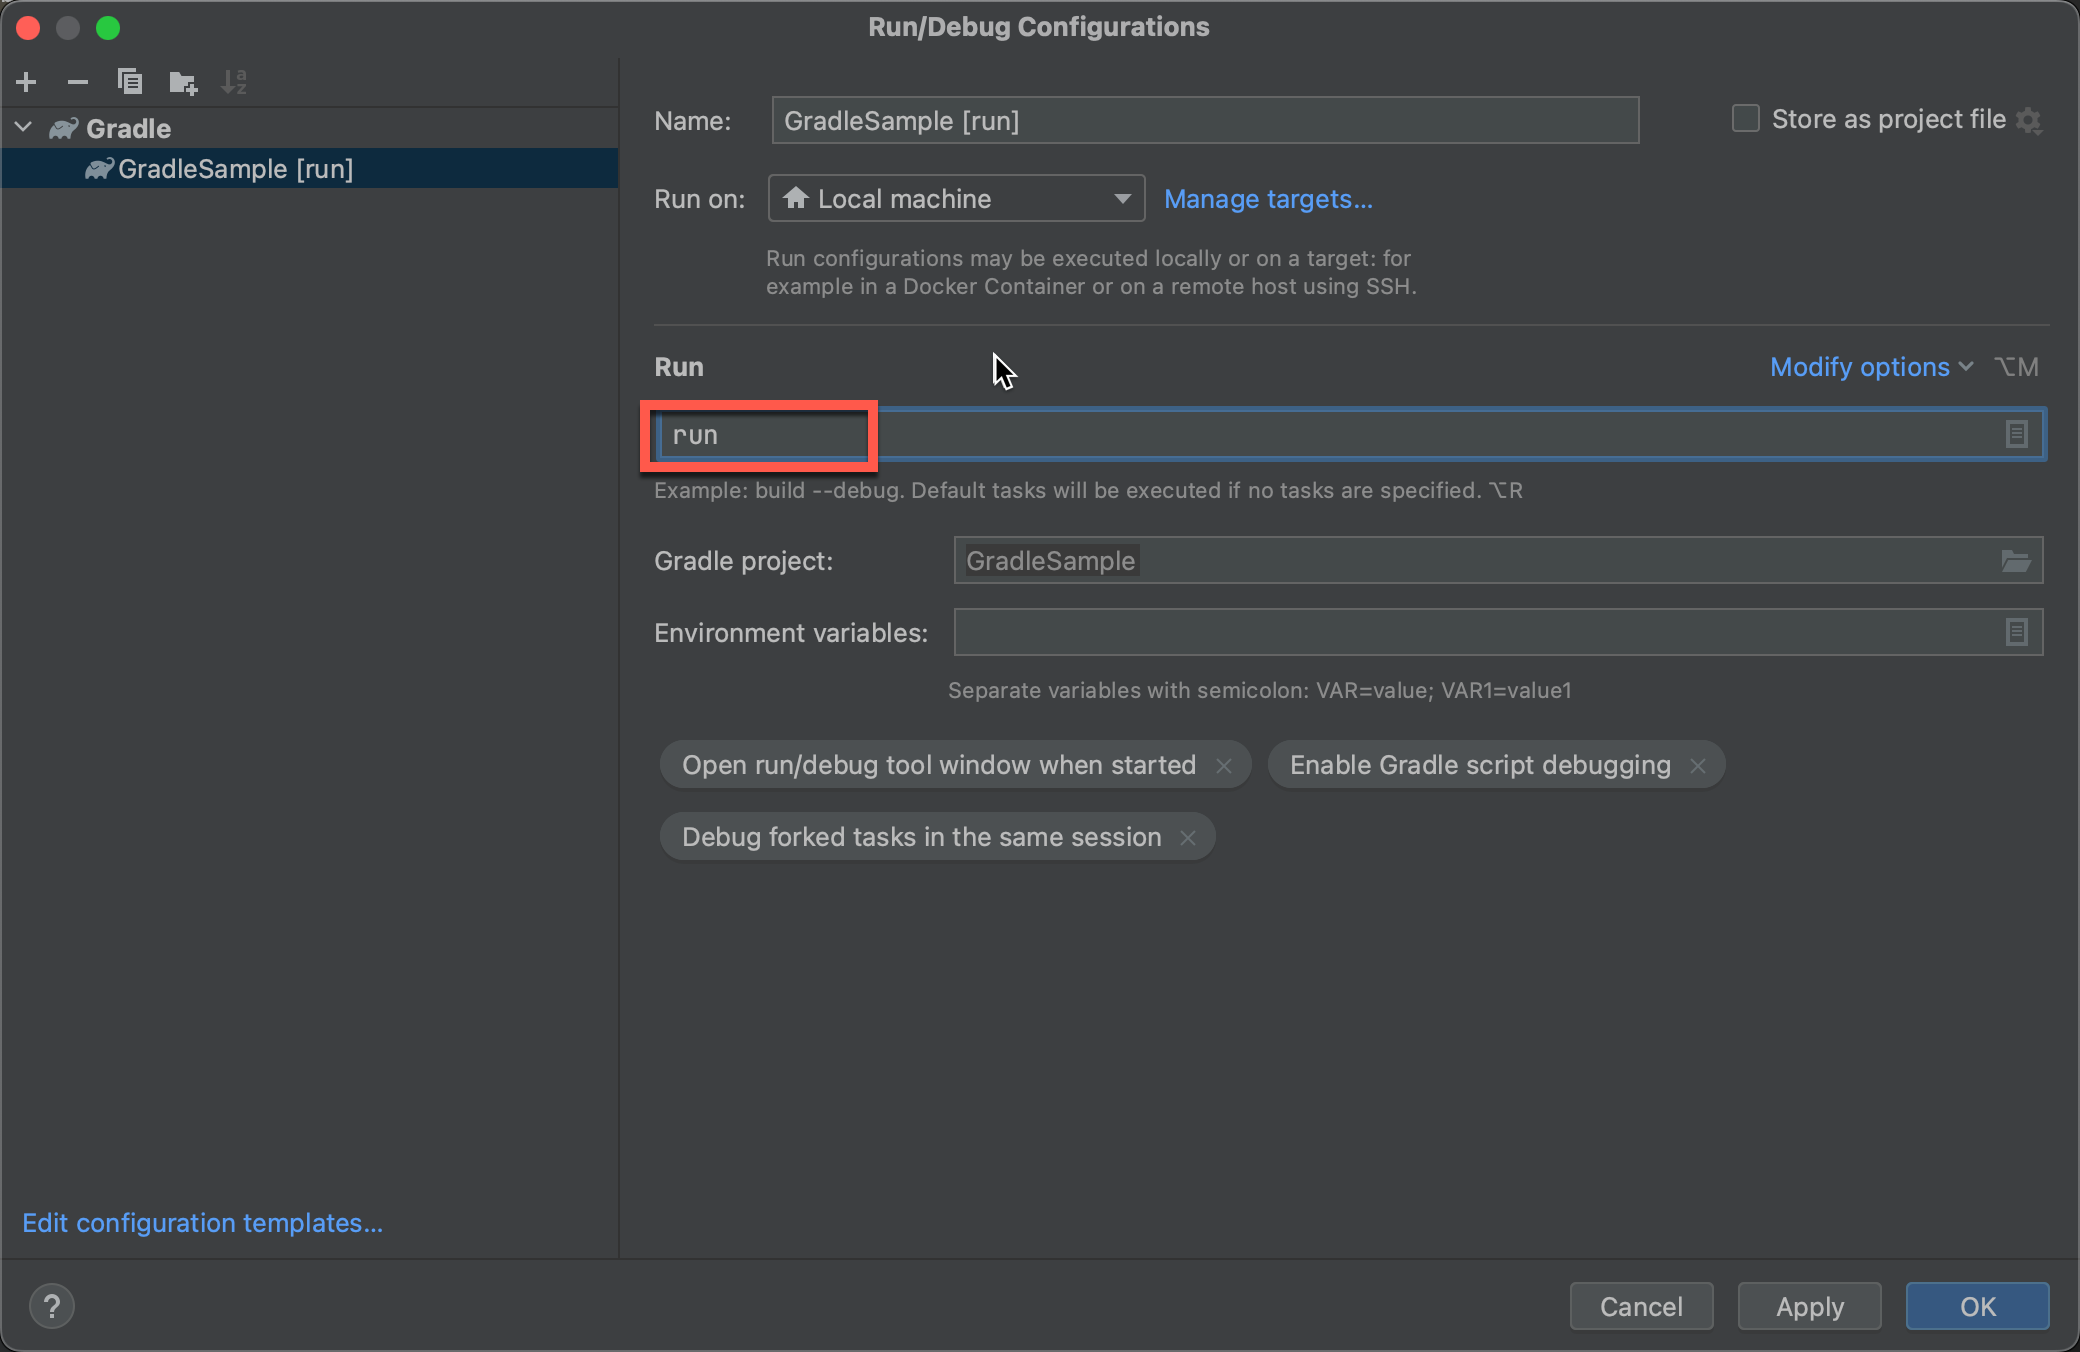
作成されたGradleSample [run]が選択されている状態で実行ボタンをクリックします。

Runウィンドウに実行結果が出力されます。
12:12:39: Executing 'run'...

> Task :compileJava UP-TO-DATE
> Task :processResources NO-SOURCE
> Task :classes UP-TO-DATE

> Task :run
Hello world!

Deprecated Gradle features were used in this build, making it incompatible with Gradle 8.0.

You can use '--warning-mode all' to show the individual deprecation warnings and determine if they come from your own scripts or plugins.

See https://docs.gradle.org/7.5.1/userguide/command_line_interface.html#sec:command_line_warnings

BUILD SUCCESSFUL in 344ms
2 actionable tasks: 1 executed, 1 up-to-date
12:12:39: Execution finished 'run'.
Jarファイルの作成と実行
build.gradleに以下を追記します。
jar {
	//プログラムのエントリーポイントを指定します。
    manifest {
        attributes "Main-Class": "org.example.Main"
    }

	//依存するライブラリを含む単一で実行可能なjarファイルを生成します。
    from {
        configurations.runtimeClasspath.collect { it.isDirectory() ? it : zipTree(it) }
    }
}以下のようにJavaのソースコードを修正します。プロジェクトの複数のJavaファイルがすべてJarとしてまとめられていることを確認するために、Javaのソースコードを2つ用意します。
com.example.Greetingを追加します。
package com.example;

public class Greeting {
    public void sayHello() {
        System.out.println("こんにちは");
    }
}org.example.Mainを修正します。
package org.example;

import com.example.Greeting;

public class Main {
    public static void main(String[] args) {
        System.out.println("Hello world!");

        Greeting greeting = new Greeting();
        greeting.sayHello();
    }
}
Gradle Toolウィンドウを開き、Tasks > build > buildをダブルクリックします。
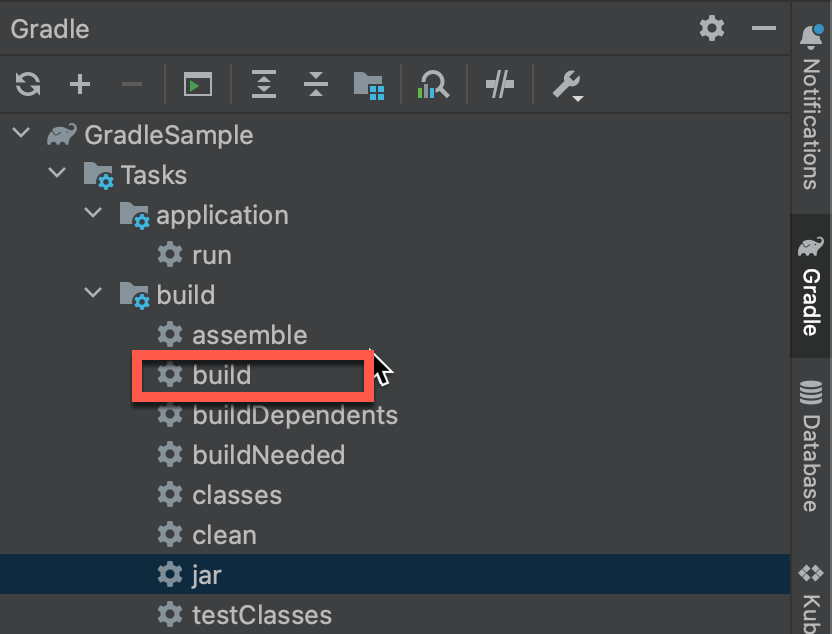
buildタスクが実行されます。
12:34:36: Executing 'build'...

> Task :compileJava UP-TO-DATE
> Task :processResources NO-SOURCE
> Task :classes UP-TO-DATE
> Task :jar UP-TO-DATE
> Task :startScripts UP-TO-DATE
> Task :distTar UP-TO-DATE
> Task :distZip UP-TO-DATE
> Task :assemble UP-TO-DATE
> Task :compileTestJava NO-SOURCE
> Task :processTestResources NO-SOURCE
> Task :testClasses UP-TO-DATE
> Task :test NO-SOURCE
> Task :check UP-TO-DATE
> Task :build UP-TO-DATE

Deprecated Gradle features were used in this build, making it incompatible with Gradle 8.0.

You can use '--warning-mode all' to show the individual deprecation warnings and determine if they come from your own scripts or plugins.

See https://docs.gradle.org/7.5.1/userguide/command_line_interface.html#sec:command_line_warnings

BUILD SUCCESSFUL in 136ms
5 actionable tasks: 5 up-to-date
12:34:36: Execution finished 'build'.プロジェクトウィンドウで、build > libs配下にjarファイルが生成されていることを確認します。
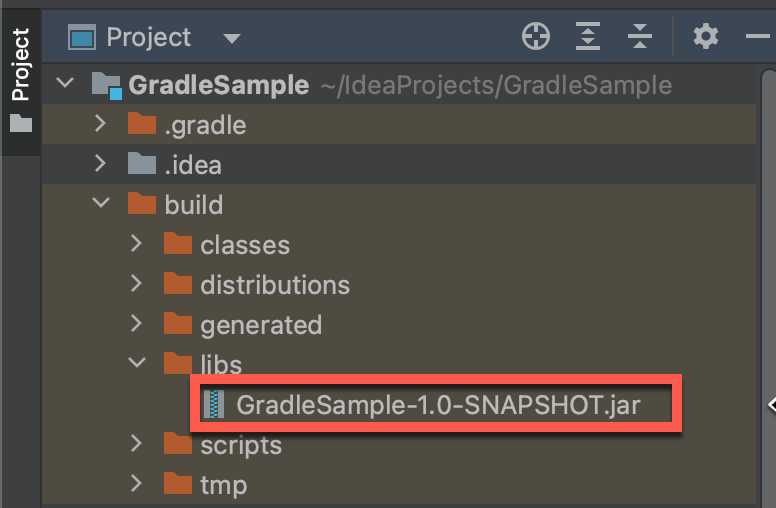
Terminalウィンドウでjava -jar build/libs/GradleSample-1.0-SNAPSHOT.jar入力して実行します。
GradleSample/ % java -jar build/libs/GradleSample-1.0-SNAPSHOT.jar
Hello world!
こんにちは
GradleSample/ %
正常に実行されることが確認できました。